
There are times when you need to find straight lines on an image. This can be done using OpenCV’s built in implementation of Hough Line Transform.
It is very interesting to see how Hough Line Transform actually works. Assume (as displayed in figure below) we have a line segment AB. In the Cartesian coordinate system, the line can be represented as y = mx + c. Now if we want to represent the same line in polar coordinate system, it can be represented as y=(−cosθ/sinθ)x+(r * sinθ)

Now, let’s assume, our line segment AB has 3 points m, n, o lying on the same. Since all the 3 points lie on the same line they will satisfy the equation for that particular line. This is the concept that is used in Hough Line Transform to identify lines.
Basically, lines are drawn from each of the points that are equal to 255 (white pixels in binary image) in all possible directions (180 degrees), and corresponding r (radius) and θ (angle) are noted down. This is done for each pixel with value 255 on the image. Now if there are multiple points on the image and they happen to lie on a line, they will generate same value of radius and θ (angle). Assume that we increment the count for same value of radius and θ (angle). When we are finished going through all the points on the image, we will have a few combinations of radius and θ (angle) which will have count more than 1. All these points that have same value for radius and θ (angle) can be joined using a straight line.
Steps for the Hough Line Transform
- First it creates a 2D array of accumulator (to hold values of two parameters) all the values in the array are set to 0 initially
- Assume R (radius) is represented as columns and θ is represented rows
- The size of array (or accumulator) depends on the accuracy you need. If you need the accuracy of angles to be 1 degree, you need 180 columns. For R (radius), the maximum distance possible is the diagonal length of the image. So if we are taking one pixel accuracy, number of rows can be diagonal length of the image.
Hough Line transform goes through all pixels in the image and looks for all the possible angles (with precision of 1 degree if you are passing pi/180). This involves a lot of computation. Probabilistic Hough Transform reduces this computation by not taking into account all the points.
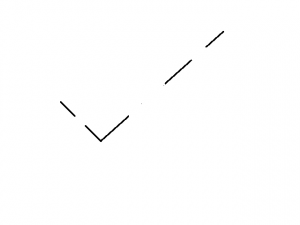
With OpenCV’s cv2.HoughLinesP you can easily find lines and join gaps in lines as demonstrated below.
The code displayed below can be used to run the example. The code is very basic that imports the necessary packages and uses OpenCV to read image, convert it to binary image. Remember we are using THRESH_BINARY_INV since we want the lines to be white in black background. Then we simply run the HoughLinesP to find the lines and then draw the same on the image.
Download code and sample image HoughLine
#import necessary packages
import cv2
import numpy as np

# Reading the sample image
img = cv2.imread('./demo.png')
imgLines = img.copy()
imgGaps = img.copy()
# Convert the img to grayscale
gray = cv2.cvtColor(img,cv2.COLOR_BGR2GRAY)

#if the line is black on white it will not work. Remember to have
#white line on black background
(T, thresh)  = cv2.threshold(gray, 200, 255, cv2.THRESH_BINARY_INV)

#lets find all lines in the image
lines = cv2.HoughLinesP(thresh,1,np.pi/180,50)
# The below for loop runs there are lines in the
#detected set of lines

for line in lines:

    for x1,y1,x2,y2 in line:
        #Draw lines on image
        cv2.line(imgLines,(x1,y1), (x2,y2), (0,255,0),1)
#display the image
cv2.imshow('ImageWithLineDetected', imgLines)

#doing the same thing as above again, however this time we are
#interested in filling the gaps. The max gap that will be filled
# whin joining lines would be 300 px
lines = cv2.HoughLinesP(thresh,1,np.pi/180,50, maxLineGap=300)
# The below for loop runs there are lines in the
#detected set of lines
for line in lines:

    for x1,y1,x2,y2 in line:

        cv2.line(imgGaps,(x1,y1), (x2,y2), (0,255,0),1)

cv2.imshow('ImageWithGapsClosed', imgGaps)
cv2.waitKey(0)

Feel free to add comments or ask questions
Reference: