

OpenCV is very powerful opensource image processing library. It can be used to carry out various operations on images. Today we are going to explore how we can use OpenCV to find and highlight the differences between 2 images.
This is a very powerful technique and it can have many uses including, security surveillance (finding difference between subsequent frames of security camera), hardware machine monitoring and maintenance forecasting, software testing (taking snapshots of pages and comparing them for change overtime or after new release) etc. Applicability of it is only limited by your imagination.
We are going to apply this on the home page of our website. The home page of CodeDeepAI.com keeps changing mostly because we keep adding blogs on the website.
Here is the original image with just 2 blog posts and then the new image with 3 blog posts.


We are going to find and highlight the difference between 2 instances of screenshot our website pages using OpenCV. Now assuming you have 2 images of a web page saved somewhere in the hard drive
We do it in following steps:
- Resize the images to more manageable size
- Find difference between the 2 images
- Convert the image to grayscale
- Increase the size of differences (dilate the image)
- Threshold the image (Binarize the image)
- Find the contours for the changes
- Display the bounding box around the change we detected
Here we go:
Download the code for this blog Post
ImageDifference
#import the required libraries including OpenCV
import cv2
#image processing utility functions
#install by running - pip install imutils
import imutils
You need to import the required libraries including OpenCV as well as imutils. You can simply install imutils using “pip install imutils” command
#Grab the images you want to compare.
original = cv2.imread("CodeDeepAI-home.png")
new = cv2.imread("CodeDeepAI-home-1.png")
#resize the images to make them smaller. Bigger image may take a significantly
#more computing power and time
original = imutils.resize(original, height = 600)
new = imutils.resize(new, height = 600)
Then we need to read the images from the disk, assuming the images are in the same folder as the code, else you need to provide the path to the images. Once the images are loaded, we resize the images to a more manageable size (height = 950 pixels in this case). You can work with the original images itself, however at times images are really large in size so it may take significantly more time to process the image.
#make a copy of original image so that we can store the
#difference of 2 images in the same
diff = original.copy()
cv2.absdiff(original, new, diff)
Now we are using absdiff function from OpenCV to find the difference between the 2 images. As we know images are internally represented as numpy arrays in OpenCV, this function simply calculates the per-element absolute difference between two arrays. The difference is returned in the third argument.
#converting the difference into grascale
gray = cv2.cvtColor(diff, cv2.COLOR_BGR2GRAY)

#increasing the size of differences so we can capture them all
for i in range(0, 3):
	dilated = cv2.dilate(gray.copy(), None, iterations= i+ 1)


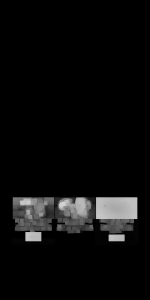
After Diff Convert diff to Gray Dilate to make diff bigger
In the lines 20-25 first we convert the image into greyscale which makes applying different operations on the image really easy and then we apply morphological (dilation) operation on the image to merge the pixels, as we are not very interested in the exact difference but we are very interested in the region of difference in images.
#threshold the gray image to binarise it. Anything pixel that has
#value more than 3 we are converting to white
#(remember 0 is black and 255 is absolute white)
#the image is called binarised as any value less than 3 will be 0 and
# all values equal to and more than 3 will be 255
(T, thresh) = cv2.threshold(dilated, 3, 255, cv2.THRESH_BINARY)

# now we need to find contours in the binarised image
cnts = cv2.findContours(thresh, cv2.RETR_LIST, cv2.CHAIN_APPROX_SIMPLE)
cnts = imutils.grab_contours(cnts)
On line number 33 we threshold the dilated gray image to binarize it. Anything pixel that has value more than 3 we are converting to white (remember pixel value 0 is black and 255 is absolute white) the image is called binarized as any value less than 3 will be 0 and all values equal to and more than 3 will be converted to 255
Then we use open CV function findContours to find the contours on the binarized image


Threshold dilated image Highlight the changed area
for c in cnts:
	# fit a bounding box to the contour
	(x, y, w, h) = cv2.boundingRect(c)
	cv2.rectangle(new, (x, y), (x + w, y + h), (0, 255, 0), 2)

#uncomment below 2 lines if you want to
#view the image press any key to continue
#write the identified changes to disk
cv2.imwrite("changes.png", new)
On line 41 we loop through all the contours we have found on the image and try to find the coordinates for rectangular bounding boxes for the same. On line 44 we make rectangles on the bounding boxes and finally save the image on disk on line 49.
Let me know if you have any questions / comments. Happy coding!
Download the code for this blog Post ImageDifference